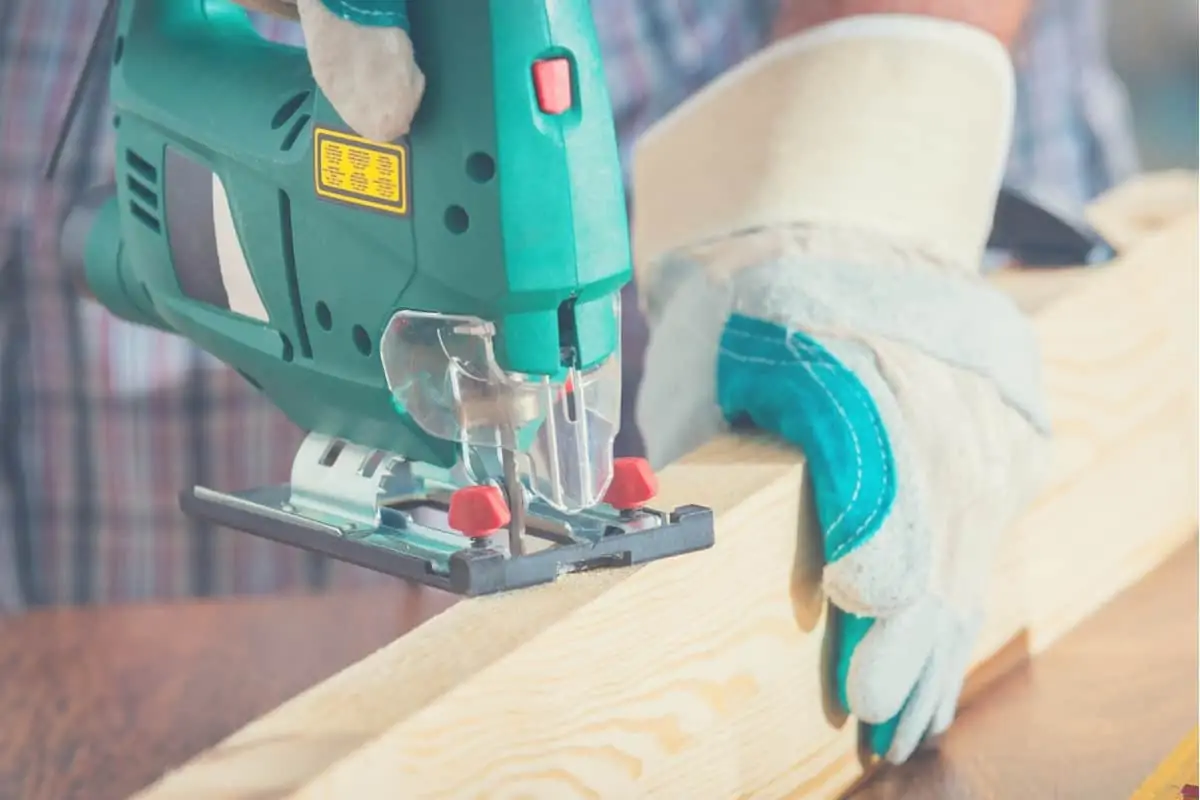
There’s no real replacement for a saw when it comes to cutting wood, but if you find yourself without one, it’s good to know how to cut wood without a saw.
If you’re in that kind of situation, a bit of knowledge never hurts and it can be the difference between making another trip to the hardware store. So, let’s hop in and I’ll show you a variety of ways to cut wood using a range of different wood cutting tools.
Cutting Wood Using a Chisel
Chisels make a precise, and easy, tool for cutting down lumber without needing a saw. The biggest issue for most people is going to be simple: the “kerf” of using a chisel means losing a good portion of the workpiece.
It’s easiest to begin with a ½” or even ¾” chisel. Make sure that it’s sharp for the best results, a dull chisel is dangerous and hard to use. Retrieve a mallet or deadfall hammer to use it, but in a pinch, most hammers will do.
Mark where you’re cutting. Do so on both sides of the chisel, so you’ll know how much wood is being removed from the workpiece. That’s doubly important if you’re planning on making multiple cuts.
If you have one on hand, a sharp knife should be used to score the marks before you begin. This will help confine the removed material to the marked area. Take note of the grain as well, chiseling across the grain is much harder but chiseling along it can remove too much material if you’re not careful.
Remove material slowly. If you’re not good with a chisel it’s best to continually remove thin slices until you’re almost broken through. You can then place the chisel vertically with the flat edge against the timber to break through the bottom of the piece.
Those with more experience may decide to dig to the bottom earlier in the process but in either case, you’ll need to finish the wood surface where it was cut. Sandpaper or a fine rasp can usually clean the overhanging material up in seconds.
Chisels are a great tool for cutting wood, but they’re much slower than a saw and require the removal of a good bit of material. They’re often the novice’s best bet if there’s no adequate saw handy, however.
Cutting Wood Using a Plane
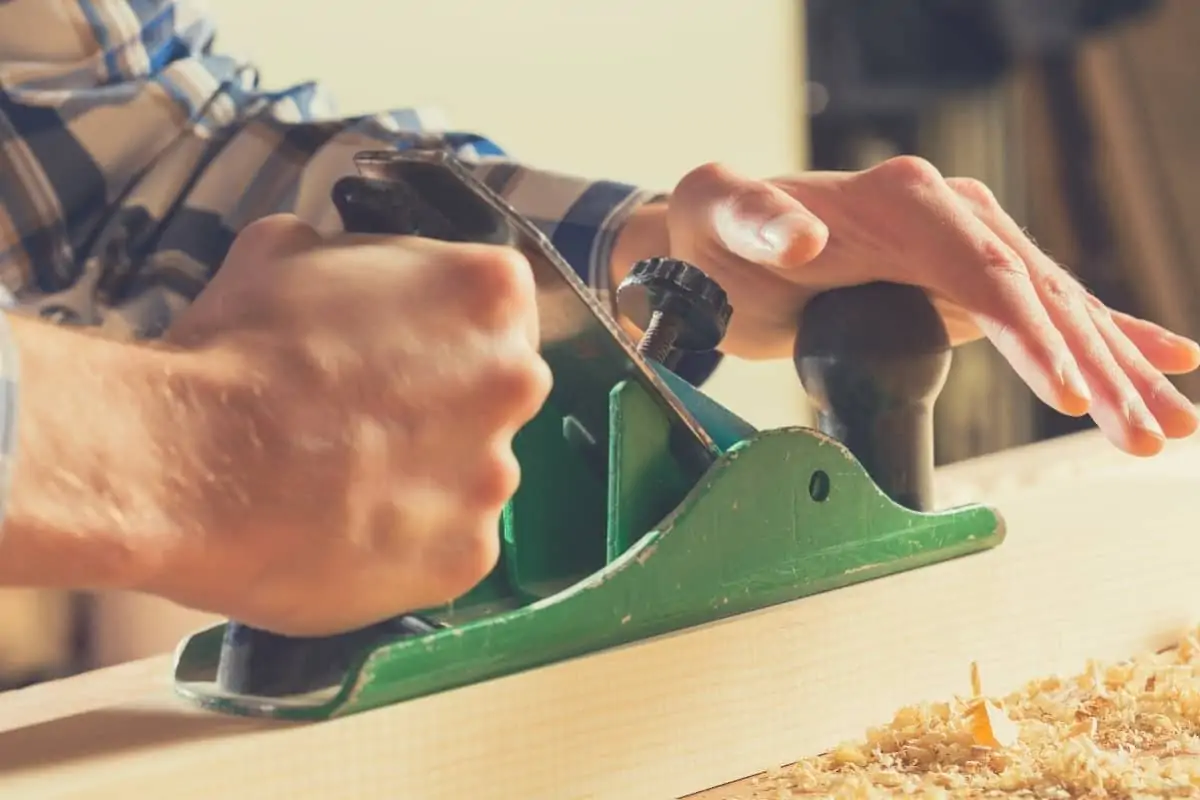
Planes are most often used to finish off large pieces of wood or to round off the edges of a workpiece in some cases. They’re not going to be much use when you’re trying to cut timber unless you spend hours trying to wear a groove through the board.
If you do have to use a plane to cut, your best bet is to scrape both sides of the board and continually lower the depth adjustment until you can break it with your hands.
On the other hand, planers are perfect for cleaning up the sloppiness that some cutting methods create. The blade in the tool is meant to level off a wooden surface, and a sharp planer makes it very easy.
Using a hand planer is as simple as scraping the blade along the length of the wood, with the grain for the best results. Make sure to move the planer all the way across the board, otherwise, you’ll end up with a chip instead of a smoother surface as the curl breaks when you lift the tool.
Electric planers are more complicated to use but should have an instruction manual.
In both cases, they’re only useful to smooth along the grain of the wood. Planing end grain isn’t something for a novice to undertake.
While a planer, on its own, may not be the most useful tool for cutting wood, they’re essential for cleaning the workpiece if you use a rougher method.
Cutting Wood Using a Drill

Cutting wood with a drill isn’t an overly complicated task, it just leaves a rough edge. The good news is that you can cut any size of wood with one, provided that you have the patience to do so.
Grab your drill, the process is simple:
- Mark a straight line along where you want to cut
- Make a second line the width of the drill bit away, the bit should fit neatly between these parallel lines. A smaller bit is better in most cases since it leads to less material loss.
- Drill holes along the line repeatedly, closer together is better. Test the strength periodically after the first “line” of holes. Less material between holes is best, making it easier to get the pieces separated.
- Snap the wood along the line when ready.
- Clean the edges of the wood with a rasp or sandpaper
It’s a pretty easy process overall, it just requires more finish work than using a saw.
The nice part about using a drill is that you can actually achieve complex shapes if you plan ahead. Whether you need to snip down a 2×4 or cut out a reindeer silhouette for Christmas, you can achieve it with a drill.
Drills allow for complex shapes to be cut from wood without a saw, but they’ll require finish work to meet the exact parameters you’re looking for.
You can also jury rig a blade onto the end of a drill. While it’s easy to find instructions online… I’d recommend against it. There’s a reason it isn’t common practice among professionals.
Cutting Wood Using a Router]
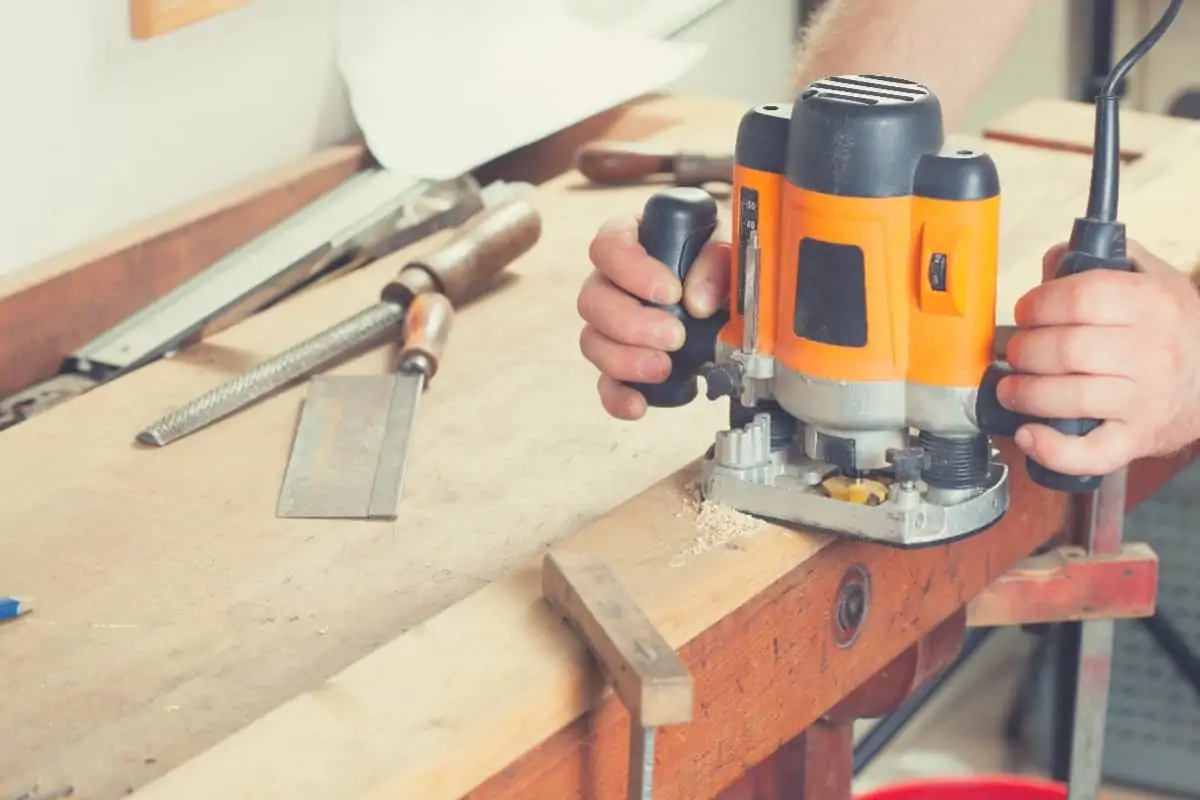
Using a wood router to cut wood is a simple process, provided that you have the proper jigs or forms for what you need. Using one freehand like a jigsaw isn’t going to allow you to be very precise and the big thing which may set you back is producing the patterns needed for your project.
Jigs and sleds come in a lot of configurations, but the most common are circles and straight lines. You can cut all the way through simply by lowering the depth adjustment of the tool.
There are special pattern bits produced for routers, with a bearing at the top that allows them to spin freely along the length of the pattern.
Exterior cuts to shape the workpiece are much easier than actually cutting through a piece of wood. The principal is the same, however, and most people prefer to make patterns to cut with. It’s a skilled art, but removing a circle or cutting a straight line is achievable for the beginner.
Routers excel in cutting complex shapes, but using them freehand doesn’t lead to a precise cut. Your experience will largely depend on the extras, but for curved shapes, they often beat out band saws and jigsaws for speedy precision.
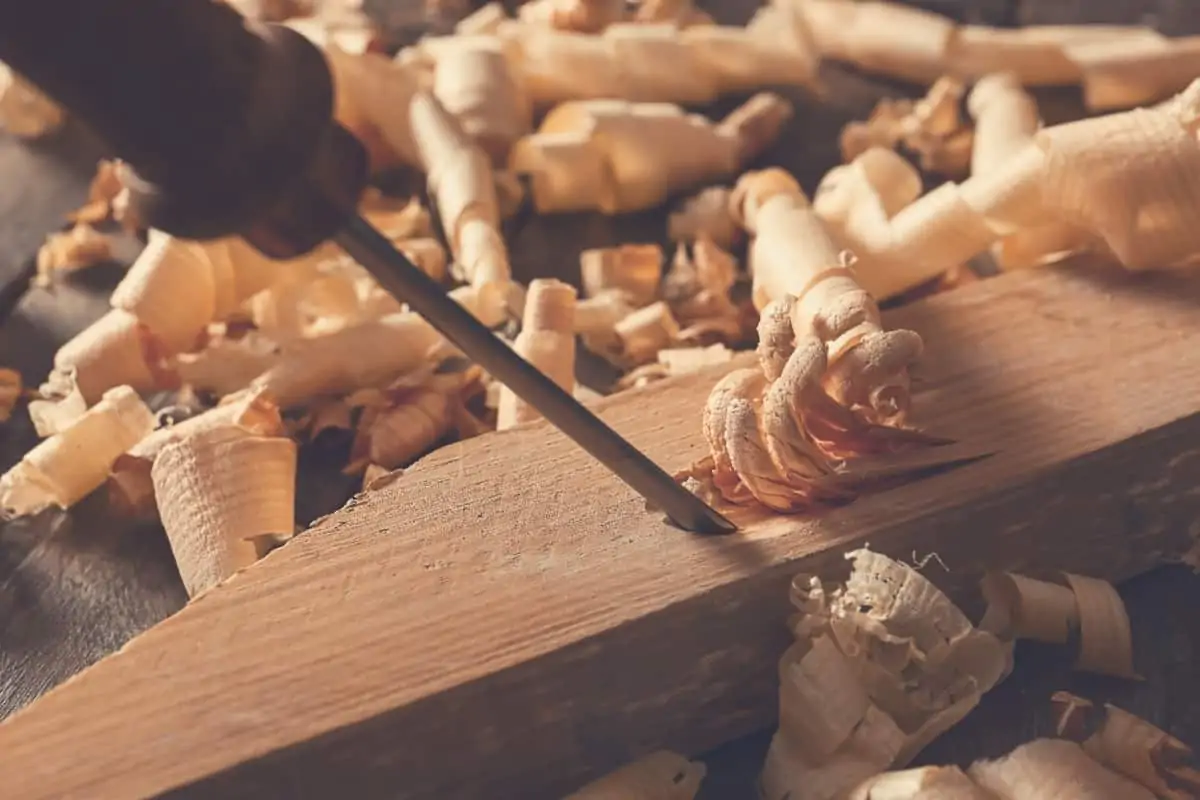
Cutting Wood Using a Lathe
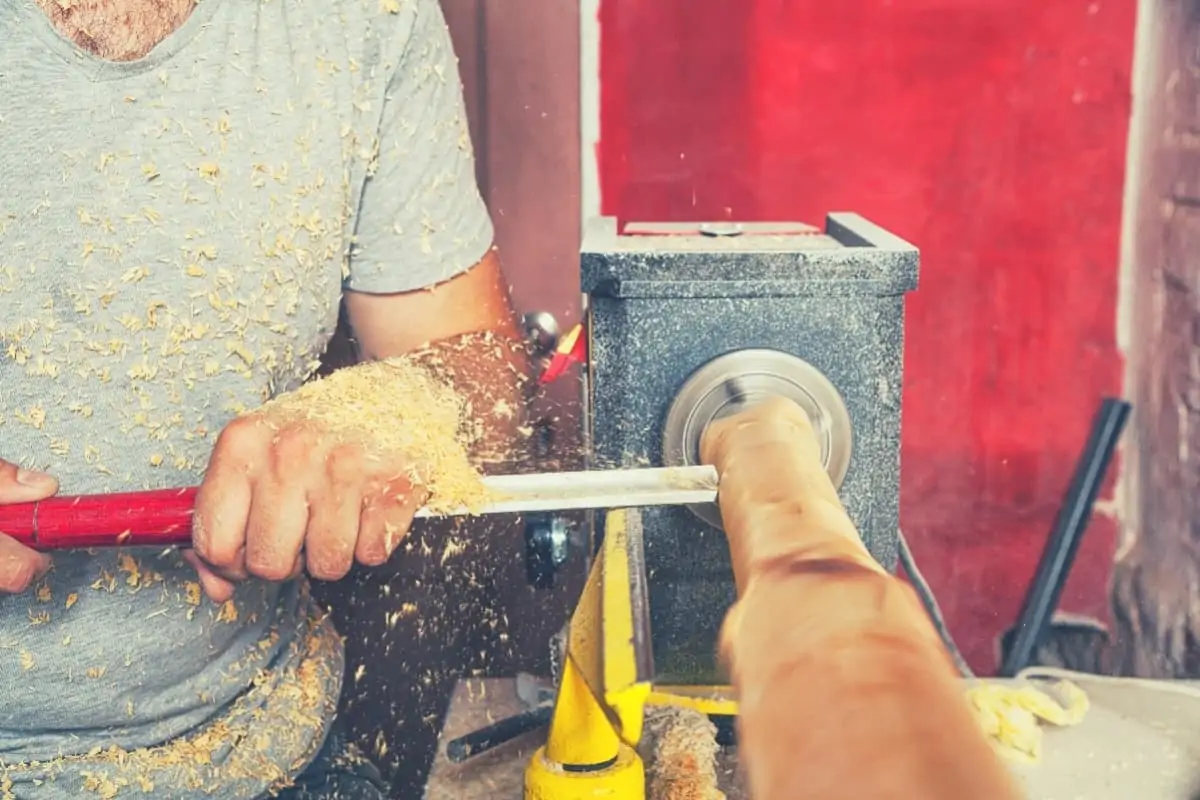
Woodturning is an art form as a whole. For many people, the spinning action and watching long curls of wood emerge from the workpiece can even be a form of therapy.
From a pragmatic standpoint, chances are a lathe isn’t your only option in most shops.
If it is your only option, you can place the piece of wood on the lathe and thin out where you need to cut with a turning tool. Continue to do so until the piece is thin enough to break. With good orientation, you’ll actually have minimal finishing work, or you can square edges using the lathe.
On the other hand, lathes are the method for making complex patterns on the outside of a piece of wood. Whether it’s threading, reducing, or just cutting bowls… a lathe is used. They’re one of the core pieces of any artistic woodshop.
Lathes are amazing tools, but not the best thing for making standard cuts in the workpiece. There are still no comparable tools in the workshop compared to a lathe, and learning the basics is essential for every would-be artisan.
Cutting Wood Using a Knife
Knives are great tools for cutting wood, but you’ll need the proper technique to do it cleanly and safely.
Start with a sharp knife. The ideal knife will have a broad, strong edge. Small stiletto style blades or light folding knives won’t make the cut and the steel may be damaged during the cutting process. A stout blade with a Scandinavian grind is ideal for most applications, and easier to field sharpen than any other style of blade.
Unlike most improvised tools, there are a few different ways to cut with a knife. Which you go with depends on both the workpiece and the knife.
Most of these methods will be quicker than using the serrations on a knife if it has any. Serrations on blades can make for a decent improvised saw on smaller pieces of wood but aren’t much use on large ones.
The Notch Method
Notching wood is one of the simplest ways to cut through. You can use it to shorten lengths of wood, and
- Select a line in the wood to begin cutting. You’ll be cutting in from two sides, so figure out the width you’re willing to cut before you go in.
- Carefully holding down the workpiece, stick the edge of the knife into the wood, and then “pry” up a small amount. Don’t just bury your knife in, a small cut is fine to begin.
- Come in from the opposite angle, doing the same thing.
- Repeat on each angle, going deeper and slightly wider until you’ve hit the edges you want to cut along.
- Continue creating the V-pattern until the wood is either cut through or easy enough to snap with your hands.
- Finish the edge, or edges, of the wood if required.
This method is a bit slow, but it’s rather precise compared to most improvised wood cutting methods. This method doesn’t require an overly heavy knife, but it may not be suitable for thin pocket knives.
Batoning Wood
Batoning is a basic bushcraft skill, and isn’t suitable for every situation. You may be able to approximate a rip cut on thin wood if necessary, but it’s primarily used to split firewood.
Please note: batoning is very stressful on a knife, and a bad knife can break in unpredictable ways. Bushcraft knives are often judged on this quality, but the main requirements are a strong edge and a thicker blade than normal.
Survival knives and combat knives often aren’t up to par here. The knife must also be longer than the workpiece is across.
The process itself just takes your knife and a mallet:
- Take the knife and place it edge down on the wood to be split. Force the blade in as much as possible.
- Smack the back of the blade with your mallet. Rubber is preferable, but field expediency usually wins out as batoning is a survival skill. Opt for a heavy branch instead of a rock if you lack a striking tool.
- Pressure from the blow will force the knife downwards. Continue striking until the knife is firmly in the wood, preferably with the knife’s spine beneath the top of the wood.
- Reposition yourself once the blade is sunk and strike the protruding tip of the blade with your club.
- Continue until the wood splits.
Batoning is mostly used for firewood. On the other hand, with a sufficiently sized blade, it’s even possible to produce crude boards for use.
Ringing Wood
Ringing a piece of wood will let you bring a round or irregular shape piece down to size. It’s another common bushcraft technique and often used to create poles for shelters.
It’s a bit time-intensive, but it can be adapted to most long pieces of wood.
- Start by marking around the edge of the piece to be cut, but be aware you’ll lose some material on both sides of the line.
- Score along the marked line with your knife. Tap it carefully with a mallet or stick if you have trouble just scraping it across.
- Proceed to notch the mark on one side, cutting in at an angle.
- Repeat the process from the other side.
- Proceed to come in from each angle, creating a deep notch. When you can, snap the piece of wood.
Cutting Wood Using a Machete
A machete can be used in the same way as a knife for the most part, provided that you’re able to control the blade. The difference between practical machetes and large knives is rather small, but on the larger end machete can have 18”-20” blades and still be a functional tool. As with the knife before, the most important thing is to make sure you have a sharp machete.
The biggest difference is in weight distribution: machetes tend to be blade heavy. So, in addition to the ways you can cut with a knife, you have more chopping capabilities.
Splitting wood with a machete requires some technique, but the same chopping properties which can fell a tree can also be used to rough timber for other purposes. Control is the key, and if you’re doing any serious chopping you should consider using a wrist lanyard.
If you’re planning on chopping with a machete then look for something thick with a heavier tip. Bolo and kukri designs are common among those who are serious about chopping, for instance.
With the chop also comes the ability to remove larger chunks of wood than you’ll be able to with a knife. In general, a machete will be less precise than a knife but the chopping power saves time and makes it easier to cut thick pieces of wood than using a smaller blade.
Cutting Wood Using an Axe
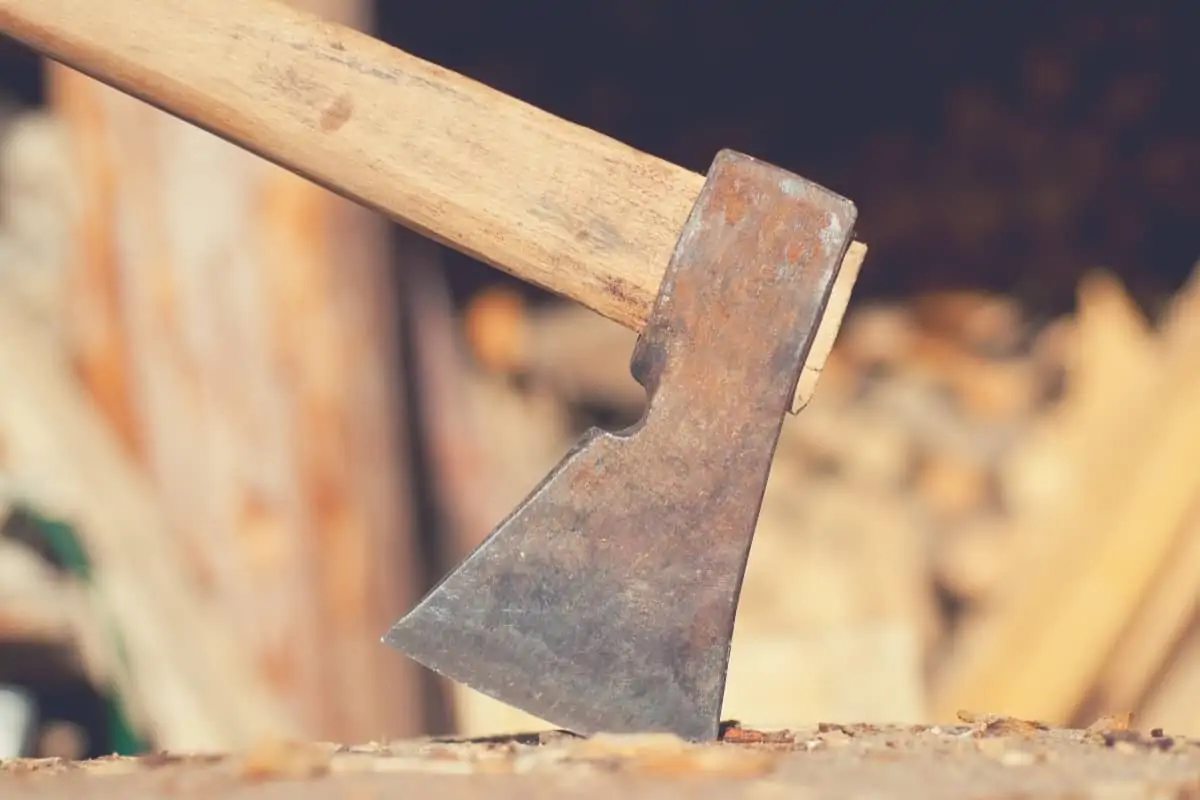
Apart from the saw, there’s no real tool that has as close of an association with cutting wood as an axe. Axes can be very precise in good hands, but even a complete newbie will find a sharp axe easy to use.
There are countless axe patterns out there, each with its own specialized use. Most people will have a felling axe around somewhere, but with the right selection of tools, you can perform most cutting tasks with them. Which ever design you use you want to make sure you’re using a sharp axe.
The general way to use an axe for chopping is to notch a log, board, or tree and cut through with successive hits from alternating angles.
Most axe variants work well for generalized chopping, except for specialist axes like a splitting maul. You’ll also want to avoid throwing axes, “Viking” axes, and tomahawks for the most part, since the blades are usually thinner and made for cutting things other than wood.
High-quality examples of “battle” axes and tomahawks may stand up to some chopping, but it’s not ideal.
Felling a tree is a complicated task and not for the faint of heart. Make sure you understand the geometry of felling a tree well before you give it a shot but chopping a piece of board or log on the ground is easy enough for most people.
If you have access to a hewing(or broadhead) axe, you can also hew timber. This is the process of creating boards and posts with squared edges and requires a deft hand and plenty of practice.
Axes are great for big, rough tasks but without specialized tools and training, they aren’t nearly as precise as a saw.
Cutting Wood Using Scissors
Scissors are an excellent option for thin wood, surpassing even saws with the right material.
The problem with them is that they’re virtually useless for any wood thicker than ⅛”, no matter how good of a pair of scissors you have. There just isn’t enough shearing force at that point.
When cutting thin wood, you can use them like normal. Dull scissors will tear into the material a bit, so make sure they’re sharp beforehand. You can also use them in a similar fashion to a knife in a pinch but they’re slower and rougher.
The ideal scissors, especially if you frequently cut wood in precise forms, are called utility shears. These are large, powerful scissors that will help you create a cleaner cut when going through sheets of wood.
Scissors have an advantage over saws in one thing: on the wood, they’ll cut they can be used in a very precise manner. For a lot of work, however, they just won’t make the cut.
Conclusion
There are a ton of different wood cutting tools to chose from, regardless of the size of the workpiece. Learning how to cut wood without a saw can only result in becoming a better craftsperson overall, even if you never have to do it. The right tool for the right situation is always best, but there’s always a way to improvise when necessary.
Have any tips we missed? Let us know in the comments!