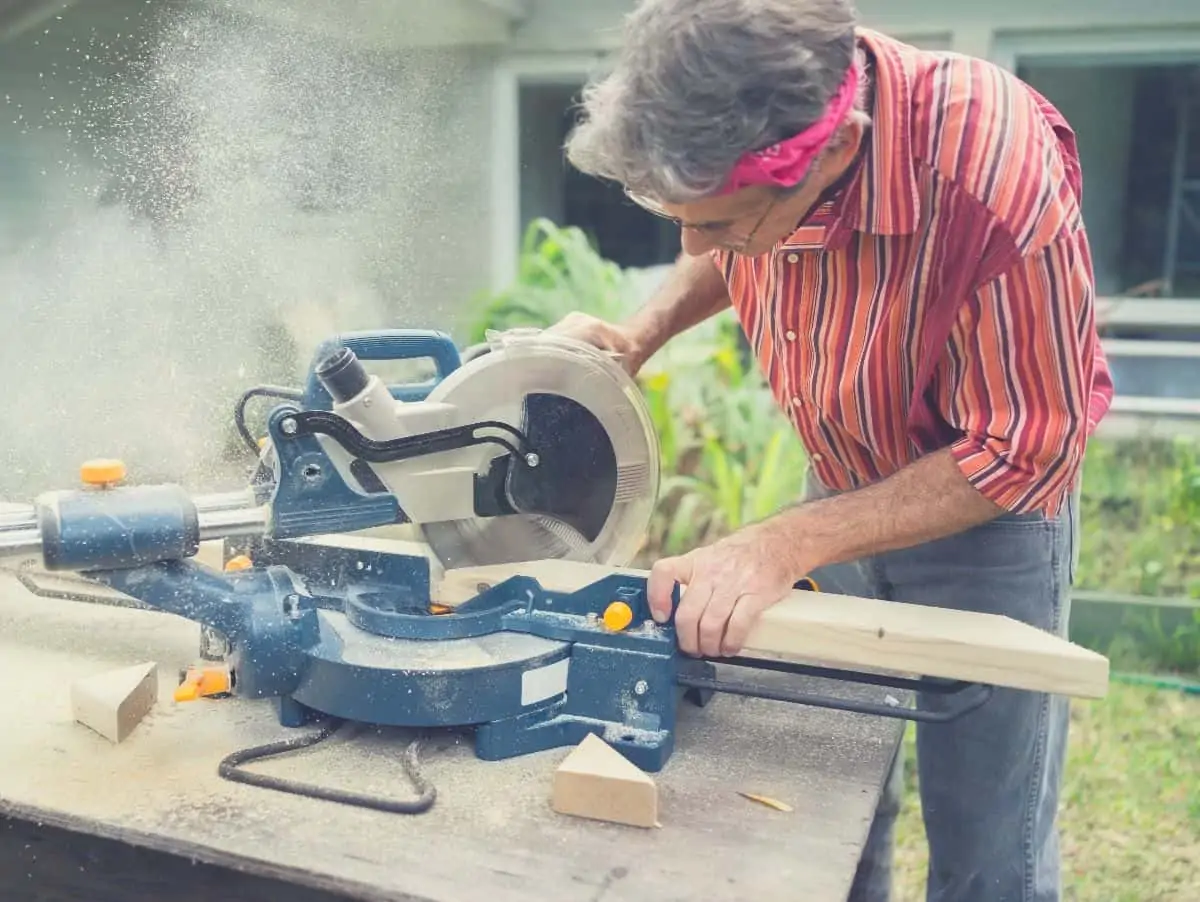
So you want to learn how to use a miter saw? Well you’ve come to the right place. In this article I’m going to cover everything you need to know to get started using a miter saw.
For framing and trim work at home, a miter saw is perfect. They’re not the most complex tools, but it still takes a little bit of finesse to handle them. If you’ve got a moment then pull up a chair and I’ll help you figure out how to use a miter saw from start to finish.
What is a Miter Saw?
Miter saws are a medium-sized, base mounted saw with a moving platform underneath them. They’re mainly used to make precise angles in wood, laminate, or plastic materials for trim and framing. These applications require accuracy, and a miter saw excels at it while being more portable than a table saw.
While it’s not essential to know every part of your miter saw, learning the main parts will help me to explain how to use it.
Blade
The center of the machine is the blade, held on the arm and spun by the motor.
Blades should be matched to the project. Blades with more teeth, particularly those 80 or more, give a much better finish. They should also be used with materials like plastic or laminates. However more teeth also make for a slower cut.
For fast rough cutting, a blade with fewer teeth often works well. They make short work of most bits of lumber, but they leave a much rougher edge. While they can be fine to cut miter angles at 45° in framing lumber, trim and other materials should be cut with a finer blade.
You should be using a crosscutting or combo blade in a miter saw. They’re not useful for rip cuts and rip cutting blades don’t make smooth enough cuts when crosscutting… they’re also more prone to the dreaded kickback when used improperly.
The blade should have a guard that covers it, which retracts when the saw is in use. Never remove the blade guard. It’s one of the most important safety features on the saw as it makes sure your fingers keep away from the blade.
Fence
The fence is a piece of metal that sits at the back of the platform for the miter saw. You push the workpiece against it during use. Many miter saws have clamps that will make it easier to work with longer stock, like the standard 8’ 2×4.
The fence is used to make sure that a cut is true to the determined angle of any kind of miter cut. It should be inspected for warping regularly.
Most have measurements which can be handy at times, allowing you to streamline multiple cuts if they’re in the right size range.
Handle and Switch
To bring the blade down a handle is mounted to the front of the cutting head. It’s meant to make it easy to bring the blade down in a controlled fashion, allowing you to control the speed you’re slashing into the workpiece at.
The switch is often contained in this handle and needs to be engaged for the blade to spin.
Miter and Bevel Gauges
You’ll have indicators for the two angles a miter saw can cut at.
Bevel cuts are created by rotating the saw blade’s position in either direction. Once in use, this creates an angled cut along the vertical axis of the workpiece. 45° is the most common angle, but sometimes you’ll need others for advanced applications.
Miter cuts, on the other hand, use the miter gauge and allow for precise angles in the horizontal plane of the workpiece. 45° is again the most common, but a smooth gauge is desirable for anyone who plans on creating anything more complicated than a square.
While the bevel gauge moves the blade, the miter gauge moves the fence in relation to the blade.
Both indicate their position with numbers. Some miter saws will have detents, which are places where the gauge sticks, rather than a completely smooth action on either.
Types of Miter Saw
There are three main types of miter saw to look out for.
Standard Miter Saw– These saws lack the ability to bevel the blade, so they’re only able to cut in the horizontal plane. It’s still possible to create bevel cuts with one, but you’ll have to adjust the workpiece for the cut, cutting from “side-to-side” rather than “top-to-bottom.”
Compound Miter Saw– What most people think of when a miter saw comes to mind. Compound miter saws allow you to bevel the blade in either one or both directions. They’re more expensive than standard saws but much more versatile.
Sliding Miter Saw- Sliding saws are the most expensive but have a rail system that allows the blade to be brought back before coming down. This allows them to cut much wider than their blade size. They’re rather expensive but nice to have for those who will be working with larger lumber.
For most at-home use, a sliding saw is a bit overkill. A solid compound saw, will do the trick.
The major exception for working at home is building a deck. You’ll need to be able to cut lumber of 2×6 or larger. In any case, the functionality is welcome if you don’t mind the higher cost.
Using a Miter Saw
Safety First!
Safety should always be the first concern when you’re working with a saw. Circular saw variations, such as miter saws or table saws, have a well-earned reputation for danger.
There’s no such thing as a minor injury with a circular saw blade of any type, the best case scenarios are life-altering injuries.
On the other hand, a miter saw isn’t overly dangerous as long as it’s operated correctly.
The first thing to do is make sure that you’re using safety goggles, flying chips aren’t just painful, they’re also distracting. That’s the last thing you need. ANSI-rated protective goggles are cheap and everyone should have a pair or two in their workshop.
After that, it’s mostly a matter of paying attention:
Hand Positions- One hand should be on the workpiece, holding it against the fence. The other should be on the handle and switch. Neither should move until the saw has come to a complete stop and returned to its original position. Always double check your off-hand’s position before engaging the saw to make sure it’s out of the way.
Avoid Kickback- Kickback is almost always caused by the blade binding due to cutting too quickly. Start slowly until you’re familiar with your saw, and always remember finer blades cut slower than rougher ones.
Let the Saw Stop – When you’re done cutting, release the trigger and allow the blade to come to a complete stop before you lift the saw blade away from the workpiece. This is particularly important if you’re using an end stop. Failure to do so can cause the off-cut piece to edge against the blade and come flying off.
Inspect Before Use- Check all parts of the saw before you begin to use it. The most important are having a smooth-moving blade guard, solid fence, and a tight connection for the blade.
Leave the Safeties Intact- Many people like to make their saws “easier” to use by altering the blade guard and other safety mechanisms. Don’t. While they can sometimes be a pain they’re there for a reason.
Mount the Saw When Practical- It’s best to have the saw bolted down to a bench, but a piece of plywood also works for saws that are being moved around a job site. It’s not a requirement to operate a miter saw, but it can prevent accidents.
If you follow the above and use your tool reasonably, you’re not going to be in any danger. Most accidents occur from ignoring one of the above guidelines.
IF you’re ever in doubt, workplace safety agencies usually have a handy safety guide.
Supporting the Workpiece
Small workpieces are usually held in place by the left hand while they’re being cut. Make sure your hand is well clear of the blade’s path and press the piece against the back fence to keep the piece straight.
Longer pieces may require a bit more support. Many miter saws have clamps built into the base which will work for keeping the piece straight in many cases.
If you don’t have clamps or the workpiece is still bowing, then you’ll need to support the ends. The base isn’t too tall on most saws, just stack some solid things up to hold up the ends.
In any case: any bowing or bending is bad, the workpiece should be perfectly straight in front of the cut. If not, you’ll be making less accurate cuts overall. A few degrees difference can be a big deal.
Basic Cuts with a Miter Saw
Basic cuts can be divided into the following:
- Straight Crosscut– Cutting across the face of the workpiece at a 90°
- Miter Cut– Cutting horizontally across the wood at an angle, usually 45° but not always.
- Bevel Cut– A horizontal angle on the workpiece, usually 45° as well.
- Compound Cuts- A cut that uses both the miter and bevel functions, creating angles in both planes.
Straight cuts are easy enough to make, you simply bring the saw blade down on the workpiece.
Miter cuts are similar, but you’ll use the miter gauge to get the angle you need when cutting the piece. Most of the time you’ll be making miter cuts along the longer side of the wood, but with a standard saw you can cut the short end to achieve a beveled edge.
Bevel cuts are made by adjusting the saw heads tilt angle before bringing it down. It will cut in a separate plane to a miter cut. Creating an angle through the thickness the workpiece if it’s laying flat with it’s width across the base and thickness against the fence.
For miter and bevel cuts you should always doublecheck the workpiece before slicing in. It should be perfectly flat and pushed against the fence. If that’s not the case, find a way to support and/or secure the piece of material.
For making compound cuts both the miter and bevel angles need to be adjusted so the resulting cut is made at an angle to two planes. Figuring out the angles you need to set your miter and bevel angles to can be tricky. Check out the video below for a demonstration. Just remember to make compound cuts, you’ll need a compound miter saw.
In all cases, the cuts are easy enough. The main thing a newbie needs to learn is how to let the weight of the saw do the cutting, rather than trying to force it through. Applying heavy downward pressure on the blade can cause binding and kickback.
Cut just on the outside of the line to be precise. Measuring should be done between each cut since the saw blade will remove a chunk of material as wide as the kerf of the blade.
Using a Stop Block
If you need to make repeated cuts, then a stop block is the best way to do it. While there are commercial ones out there, they’re not necessary for those who aren’t in the field all the time.
You’ll need to make a platform that is flush with the top of your miter saw’s table. Stacking 2×4 off-cuts is the way to do it, and you can use thinner shims to get the height just right.
Afterward, you’ll measure the length you need to make the same cut repeatedly. Measure from the blade to the platform.
Make a line with a pencil and screw down a piece of wood to the improvised platform. Keep it flush.
They’re easy to use from there: simply push the piece of wood flat against the block, push it into the table saw’s fence, and bring the blade down. While an improvised one is hard to adjust, they’re also simple to make.
Stop blocks are most often used for repeated straight or miter cuts, but they can work for compound cuts as well.
Making an Extension Fence
Miter saws don’t come with a very long fence, most just cover the table of the saw. For long pieces of material, you may need to get crafty and improvise an extension fence.
They’re also commercially available, but they can be a bit expensive for those who aren’t using their saws to make a living.
Each case will be a little bit different, but here’s the general idea:
- Get some MDF, ¼” inch is fine for this purpose.
- Cut two pieces of the MDF at 24-48” long and 6” wide.
- Cut two strips at the same length and 3” high.
- Use wood glue and a couple of screws to connect the 3” strips perpendicular to the 7” wide base for the saw.
- Place flush with the existing fence on the saw.
- Secure to the workbench with screws or a large C-clamp on the end of the fence if holes in the bench aren’t wanted.
That’s likely the easiest extension fence you can put together at home. If you have skills for it, there are a number of improvements to be had.
Sliding Stop Block – You can cut a channel in the wood with a router and set an aluminum rail in the wood. A stop block is created with something that fits tight in the rail, you can then clamp it down at the desired length.
Dowel Mounting – Instead of dealing with clamps, you can make holes in your workbench and the bottom of the fence. Short pieces of ½” dowel can then hold the fence steady. This allows you to easily remove the fence from your bench.
Whole Station – Dedicated craftsmen will sometimes fabricate an entire workstation for their miter saw. Usually, these include an extended fence, movable stop blocks, and even casters for moving the cart.
The extension fence is one of the most common and versatile modifications. It’s also newbie-friendly, so it’s worth a shot when you’re cutting longer material.
Conclusion
Learning how to use a miter saw is rather easy. Most of the real gains you’ll make when using them come with time and experience, however.
On the other hand, starting out with a miter saw? Just be safe and go for it, it’s an easy process. Learning the angles you need and following your plan to the letter are the hard parts of construction with one of these saws.
Do you know anything we missed? Let us know in the comments below!


